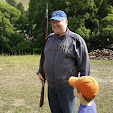
Today the gaming group came over to my place to take our first run at a Fire and Fury Regimental game. Our scenario was "Breakout from Fort Donelson" from the Guns at Gettysburg "Heartland" scenario book.

Our Group. Not Pictured: Me
The scenario depicts Pillow's attack on the unanchored Union right on February 15th, 1862. Two huge Union brigades are holding a ridge line, and six small Confederate brigades must push them off, take the road behind the ridge, and open a path for the Confederate army to escape.
The regiments in this scenario are big! The largest Union regiment weighs in at 18 stands, which represents 720 men. The smallest Union regiment is 14 stands, or 560 men. The Confederates have some large regiments of around 12-14 stands, but many of their regiments are little 6 stand affairs.
Most of the Union force is on their left, with five huge regiments and two batteries holding that commanding ridge line. I commanded the Confederate left, and I just didn't have the strength to move the Union off that line. Instead, I hoped to pin the Union forces in this area, holding their attention while Jon took three brigades around the Union right.
My troops lost several stands to artillery fire while crossing the open ground between the two ridges. Two of my veteran brigades were cut to pieces before ever engaging the enemy.
Don commanded McArthur's brigade, holding the exposed position on the Union right. His green troops had trouble changing position quickly enough to meet Jon's flank attack.
Jon was able to make contact with Don's regiments and force them back. Here we found the biggest difference between RFF and BoFF: the sweeping, lopsided results of BoFF are (mostly) gone. Units take losses and give ground much more slowly. In BoFF, Jon might have swept Don off the ridge in one sudden lunge. In RFF, it took several turns of pressure to make the Union give up their positions.
While Jon pried open the Union flank, I kept up the pressure on the Union center, trying to keep them too off balance to reorient their lines. Again, progress was incremental. In this part of the field, at least, the green Union troops gave as good as they got. I pushed them back a couple hundred yards, but they kept in good order.
On the Confederate right, Scott R. took his Union brigade into the attack. He routed two of my regiments and wore down a third. With more time, this attack might have threatened the Confederate position. But Scott's regiments were slow owing to poor maneuver rolls.
To make matters worse for the beleaguered Union right, N.B. Forrest arrived with a regiment of cavalry and two regiments of infantry almost in the Union rear. This was too much for the green Union troops, who fled in a panic. The road was open, and the Confederate army could escape.
We played out seven turns of the game, representing 70-105 minutes of real time. The rules keep many of the mechanisms from BoFF, but there are enough nice touches to change the overall feel of the game. We've all been playing Fire and Fury since the rules came out. We enjoyed Age of Eagles very much, feeling that it took a solid game system and refined it, adding some layers of complexity to the Civil War version.
The regimental game seems to take these refinements even farther. The rules allow for period appropriate tactics. A unit's quality makes a real difference to its battlefield performance. The rules are accessible enough that we could jump right into a game with only a brief glance at the reference sheets from time to time. There are enough little nuances that the game feels realistic without being overly complex. I think we'll be playing these rules for a long time to come.


I agree - they are a lovely set of rules, and are now my rules of choice for ACW. I'm keen to pick your brains on how you handle the modifiers though... it seems that when we play we have to calculate the moving and firing modifiers every time we move - in a big game this is going to be onerous, especially when you throw in various qualities of colonel/brigadier/training etc. How do you guys do it so you don't have to keep working it out each turn????
ReplyDeleteUsually if you roll your die first, you'll know whether to bother calculating the modifiers. A fresh unit within command range, for example, won't have any problems with anything more than a 3. It's only when your units get worn, disordered, or out of command that you have to regularly check modifiers.
ReplyDeleteYep - we started doing the same - still leaves having to work through them 7 times out of 10 though... I was thinking along the lines of an index card per regiment - wipe clean surface just to note their mods move to move - we know the situations that would change them, and just re-work them if we had to.....
ReplyDeleteVery nice report and mini's.
ReplyDeleteI haven't tried regimental F & F,but I do play brigade level F & F and I think they were and still are the best set of rules for ACW.
Cheers
Christopher